If you've spent more than five minutes with the NES library, you've encountered Contra. But have you really played it? I'm not talking about muddling through with thirty lives and hoping for the best. I'm talking about understanding every enemy spawn pattern, knowing exactly where each power-up drops, and clearing the game clean on three lives like it was meant to be played.
I've spent the better part of three decades with Contra. Speedruns, co-op runs, weapon-limited challenges, blindfolded runs—I've done them all. And after all these years, Contra (NES) remains my absolute favorite game on the system. It's not just about memorizing patterns. It's about developing a rhythm, reading the screen, and making split-second decisions that separate good players from great ones.
Let me walk you through everything you need to know to master Contra.
What Makes Contra Special
Released in North America on February 12, 1988, Contra brought the arcade experience home in a way few ports did. Unlike the arcade original, the NES version restructured the seven stages into eight, completely redesigned level layouts, and introduced a weapon system that would define the series.
The genius of Contra is its simplicity on the surface with incredible depth underneath. Move left or right. Jump. Shoot in eight directions. One hit and you're dead. Sounds simple, right? But within that framework lies a masterpiece of design. Every enemy placement is deliberate. Every platform requires a specific approach. Every weapon choice changes how you approach each section.
The NES version has some key differences from the arcade that make it unique:
- 8 stages instead of 7 (restructured from the arcade)
- No time limit in the base stages
- Weapon power-ups now appear in flying capsules regardless of your current weapon
- More frequent Rapid Bullets and Barrier power-ups
The Weapon System: Understanding Your Arsenal
Contra gives you four main weapons plus your default rifle. Understanding when—and more importantly, where—to use each weapon is the difference between a casual player and a master.
Default Rifle (R)
Infinite ammo, single shot per button press. Don't underestimate this. In tight corridors or situations where you need precision over power, the rifle's single-shot nature can actually be an advantage. You control exactly when bullets fire, which matters for certain enemy patterns.
Machine Gun (M)
Hold the button and it sprays bullets. Sounds amazing, right? Here's the truth: the Machine Gun is overrated. Yes, it fires faster, but the spread of bullets isn't consistent enough to hit enemies reliably. I only pick this up in two situations: the Waterfall stage for the flying enemies, or if I'm desperate and anything is better than nothing.
Laser (L)
A single beam that pierces through enemies. This is the most misunderstood weapon in the game. Yes, it's powerful. Yes, it hits multiple enemies. But it's inconsistent against fast-moving targets and creates situations where you think you've covered an area when you haven't. The Laser has niche uses, particularly in certain boss fights where piercing matters, but for general gameplay? Skip it.
Fireball (F)
Five bullets spiral in a corkscrew pattern. The Fireball is tricky. The spiral pattern makes coverage unpredictable, and in tight situations, the last thing you want is uncertainty. It has some utility against larger enemies where multiple hits land, but again, not my go-to.
Spread Gun (S)
The king. The absolute weapon of choice. Five bullets spread in a fan pattern, covering massive screen real estate. This is what makes Contra manageable. The Spread Gun turns situations where you'd be dodging desperately into situations where you're clearing screens with confidence. If you see a red capsule with an 'S', you take it. Period. The only time I'll pass on Spread Gun is in the 3D base stages where the spread doesn't help with the narrow corridors.
Rapid Bullets (R) and Barrier (B)
These are situational. Rapid Bullets increases your firing speed, which is nice for the default rifle or Machine Gun, but combined with Spread Gun, it creates bullet hell that clears everything. Barrier gives you temporary invincibility—game-changing for specific boss fights and the absolute chaos of the final stages.
Stage-by-Stage Strategies
Let's break down each stage from the perspective of someone who's run them thousands of times.
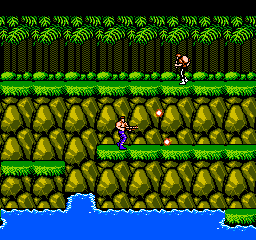
Stage 1: Jungle
The tutorial stage disguised as real gameplay. This is where you learn the rhythm of Contra.
Key tips:
- The first power-up is always a Spread Gun. Take it.
- After the bridge section with the rotating guns, duck under the next platform and wait for the flying capsule with another Spread Gun. There's a consistent spawn here.
- The boss (the giant wall defense system) can be destroyed faster if you position yourself correctly. Aim for the glowing sensors, not just spamming bullets everywhere.
Pro strat: In the opening jungle section, don't just run forward. There are hidden enemy spawn points that trigger based on your position. Moving deliberately makes enemies spawn in more manageable patterns.
Stage 2: Base 1 (3D Corridor)
Your first taste of the 3D stages. These test your spatial awareness as much as your reflexes.
Key tips:
- The default rifle is actually fine here. The Spread Gun doesn't help much in narrow corridors.
- Learn where each electric generator is. You need to destroy the one blocking your path.
- In the fixed-screen boss fight, destroy the defense systems first, then focus on the giant eyeball.
Pro strat: Time your shots carefully. In 3D stages, you can shoot enemies before they appear on screen if you know their spawn patterns. This is the difference between clearing a corridor comfortably and getting overwhelmed.
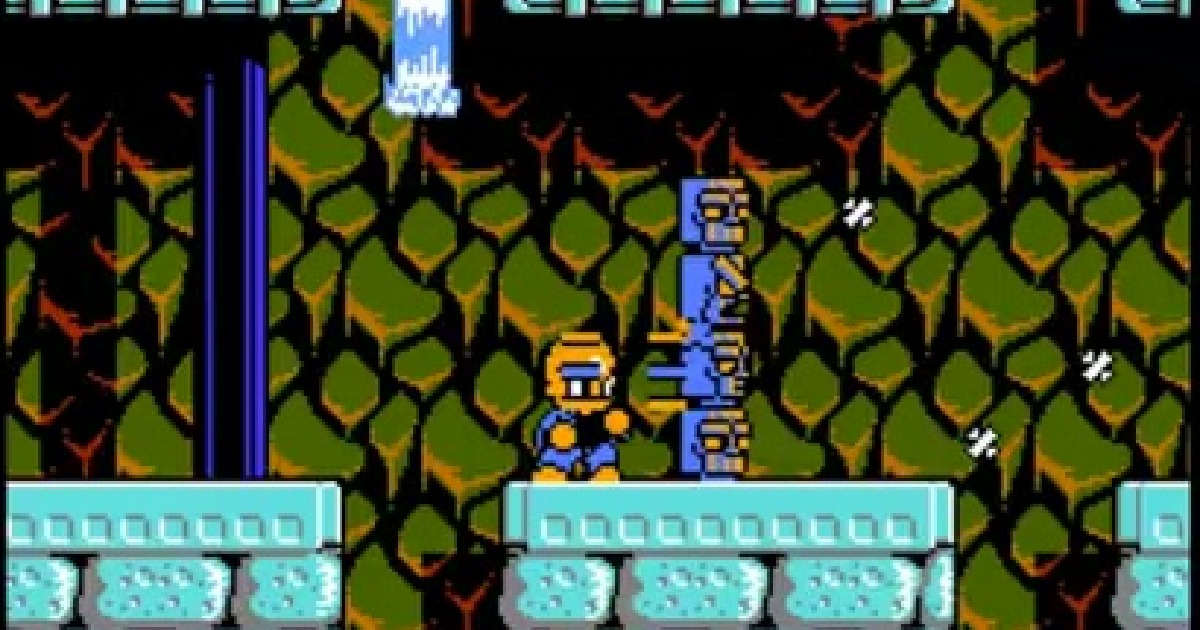
Stage 3: Waterfall
This is where the difficulty spikes hard. Vertical scrolling, platforms, enemies spawning from everywhere.
Key tips:
- CRITICAL: The second power-up in this stage is a Spread Gun. Do not miss it. It spawns from a flying enemy about two-thirds of the way up.
- The jumping enemies here are deadly. Prioritize them over ground enemies.
- The boss (the alien statue) has a predictable pattern. Learn it.
Pro strat: There's a safe spot during the boss fight. Position yourself on the middle platform, crouch, and aim up. The boss's attacks will miss you while you're free to damage it.
Stage 4: Base 2 (3D Corridor Part 2)
More 3D action, but this one's trickier.
Key tips:
- This stage is longer than the first base. Pace yourself.
- Watch for the red guards in the corridors—they drop power-ups if you're not already carrying a special weapon.
- The final boss (the two splitting heads) requires timing. You can only damage them when the split images align.
Pro strat: Learn the path through the maze. There's an optimal route that minimizes backtracking and exposure to enemy fire. Once you memorize it, this stage becomes much easier.
Stage 5: Snowfield
The first of the four final stages that were originally part of the arcade's final stage.
Key tips:
- Spread Gun is essential here. The open spaces make it devastating.
- Watch for the snowballs rolling down slopes. They're deadly but predictable.
- The tanks at the end are tough but manageable if you keep moving.
Pro strat: There's a rhythm to this stage. Run, stop and shoot, run again. Don't try to run through everything. Controlled bursts of movement are safer.
Stage 6: Energy Zone
Electrified floors, moving platforms, and enemies that spawn from walls.
Key tips:
- The electrified floors kill you instantly. Watch your step.
- The vertical section with moving platforms is the hardest part of the stage. Take it slow.
- Spread Gun makes this stage manageable.
Pro strat: In the vertical section, there are platforms you can stand on safely between enemy waves. Learning which platforms are safe saves you from unnecessary deaths.
Stage 7: Hangar
Bullets everywhere. This stage is pure chaos.
Key tips:
- Spread Gun is mandatory. The density of enemies makes anything else struggle.
- The hovercraft section is the most dangerous part. Move constantly.
- Barrier power-ups are incredibly useful here.
Pro strat: There's a rhythm to clearing rooms. Clear the immediate threat first, then move to the next. Don't try to clear everything at once.
Stage 8: Alien Lair
The final challenge. Everything comes together here.
Key tips:
- The final boss has two phases. The giant alien head spawns—you guessed it—aliens. The final form is a heart-like creature.
- This stage is the reason you conserved lives. One mistake and it's over.
- Spread Gun + Rapid Bullets is the ideal setup.
Pro strat: The final heart boss has a pattern you can exploit. Stay on the far left, crouch, and aim up-right. Most of its attacks will miss while you chip away at it.
Advanced Techniques
If you've mastered the basics and want to push further, here are techniques that separate good players from great ones.
The Somersault Advantage
Your character somersaults when jumping. This animation has a shorter hitbox than standing. In tight situations, jump intentionally—sometimes taking a hit in the air is safer than standing still.
Weapon Conservation
You don't always need to grab every power-up. If you have Spread Gun and the next power-up is Machine Gun, skip it. Conserving your best weapon is often the smarter play.
Screen Scrolling Manipulation
The screen only scrolls when both players move forward. In co-op, one player can stay back while the other advances, forcing enemies to spawn in a more controlled manner. In single-player, positioning yourself on the screen influences where enemies appear.
Jump-Shooting Mastery
Shooting while jumping gives you eight directions of fire combined with aerial mobility. Mastering diagonal shots while jumping makes you far more dangerous and harder to hit.
Knowing When to Stand Still
Sometimes, the best move is not moving at all. Certain enemy patterns are easier to dodge if you're positioned correctly and firing from a safe spot rather than constantly running.
The Konami Code: Use It or Don't
Here's my hot take: The Konami Code (↑↑↓↓←→←→BA) is a double-edged sword.
On one hand, thirty lives lets you brute-force your way through the game. On the other hand, it removes the tension and forces you to actually learn the patterns.
If you're a beginner, use the code. Experience the whole game, understand the flow, enjoy the victory. But once you've beaten it, turn it off. The real satisfaction comes from clearing Contra clean, three lives, making every shot count. That's when you truly understand the game's design.
Why Contra Still Matters
Nearly 40 years later, Contra remains the gold standard of run-and-gun games for a reason. Everything works. Every enemy, every platform, every weapon—they all serve the core gameplay loop.
Modern games have more pixels, more polygons, more systems. But Contra has something rare: absolute focus. It knows exactly what it is and executes it perfectly. No filler. No bloat. Just tight, responsive, rewarding gameplay.
When I play Contra today, I'm not playing out of nostalgia. I'm playing because it's still one of the best-designed games ever made. The patterns I learned as a kid still work. The strategies I developed years ago still hold up. That's timeless design.
Getting Started with Contra on Rebit
Ready to dive in? Here's my recommended path:
- Start with the code. Beat the game once with thirty lives to see everything.
- Memorize the Spread Gun locations. These are your lifelines.
- Practice one stage at a time. Don't try to learn everything at once.
- Turn off the code once you can consistently reach Stage 4.
- Aim for a clean run with three lives. This is the real mastery test.
Contra on Rebit's Netplay opens up new possibilities. Playing co-op with a friend adds a layer of coordination that changes the game entirely. Just remember: your partner's position affects the screen scrolling. Communicate, coordinate, and watch each other's backs.
If you are setting that up for the first time, start with play NES games online, then use play retro games online with friends for the room flow. If input delay gets in the way of clean jumps or Spread Gun timing, run through the fix retro netplay lag checklist before blaming the game.
Rebit does not provide Contra or any copyrighted ROM downloads. Use a legally owned NES file from your own collection, then treat netplay, autosave, and quick saves as tools for cleaner practice.
Contra isn't just a game. It's a test of your ability to read, react, and execute under pressure. Master it, and you'll have a deeper appreciation for game design that most players never experience.
So grab your controller, memorize that Spread Gun timing, and show Red Falcon who's boss. And remember: one hit kills, but knowledge survives forever.